Introduction:
My friend Donald Simpson recently pointed me to an entry on his blog about going through the Terraform startup instructions. I decided to follow them, and his notes; this is a description of how it went for me. Note that mine is a lot more verbose than Don’s – he’s a guru who assumes a depth of knowledge that I didn’t have! The main difference between his approach and mine is that I’ve used Windows 10 and PowerShell…
Setting up AWS:
I started this process from scratch – so, the first step for me was to set up my AWS account. I started at the How do I create and activate a new Amazon Web Services account? page – it wasn’t all plain sailing: the first problem was getting them to call me for the phone verification. How frustrating is it that you have to wait 12 hours after 3 failed attempts? Still, it was late when I started, so I paused and continued the next morning…
I created 2 users on the Management Console using the Creating Your First IAM Admin User and Group guide – an ‘automation’ user and an ‘admin’ user – initially, I gave both admin (but, obviously, not root) access. I’m going to use the ‘automation’ user for this exercise. I set up Access Keys for them both – when you do this stage, make sure that you note the keys or download the csv file that contains them at creation time – you won’t get another chance (although you can just create a new key).
Installing Terraform:
I installed Terraform on my main PC as per the instructions in the guide – no problems there at all. I set a user environment variable TFORM to C:\Users\adam\TFORM. I checked everything was in place by running terraform:
C:\Users\adam\TFORM>terraform
Setting up the example build script:
I created a folder – terraform-intro – for this, and created the example.tf file with this content:
provider "aws" {
access_key = "ACCESS_KEY_HERE"
secret_key = "SECRET_KEY_HERE"
region = "us-east-1"
}

resource "aws_instance" "example" {
ami = "ami-2757f631"
instance_type = "t2.micro"
}
Obviously (I hope) I substituted the access key and secret key for the user I’d created. Note that the ami (Amazon Machine Image) identifier code that is captured here represents a specific machine image in a specific region – although you can use identical machine images in different regions, they will have unique identifiers.
Preparing to make the changes:
Next, I ran terraform init, then terraform plan:
C:\Users\adam\terraform-intro>terraform init
C:\Users\adam\terraform-intro>terraform plan
The plan, if it’s not obvious, is what Terraform will look to do using the .tf file (any .tf that it finds). It uses a diff-like annotation – so ‘+‘, in this case, means an addition.
Creating AWS infrastructure:
Then I ran terraform apply to apply the changes:
C:\Users\adam\TFORM>terraform apply
(The sequence above has been shortened considerably) – it took about 70 seconds to run on my machine).
Confirming it worked:
Finally, I took a peek at what I’d achieved:
C:\Users\adam\TFORM>terraform show
Next, I took a look at the console to check what was there – I checked in EC2 section under ‘Services’: https://console.aws.amazon.com. At first, I struggled to identify my new instance using the AWS console – I couldn’t, for the life of me, understand why I couldn’t see my newly created instance on the console. What was I doing wrong? I was definitely looking at the EC2 console, but it showed 0 running instances…
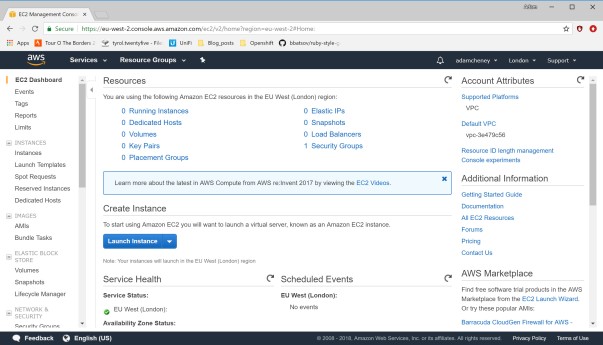
In the end it was obvious: in the top right corner you can see ‘London‘ and the URL is: https://eu-west-2.console.aws.amazon.com/ec2/v2/home?region=eu-west-2#Home: – but the example.tf file that was the basis of this terraform construction specified: region = "us-east-1" – changing that setting to ‘N. Virginia‘ showed a single running instance:

Summary:
Terraform is a great way of creating infrastructure on any number of providers, and expressing it as code. Their ‘Getting Started’ example is easy to follow and there is heaps of good documentation on their site.
Next steps:
I’m going to playing with Terraform and AWS a lot in the near future, so I’ll try to get some more information about how the .tf files work, as well as some more complex examples.